Creating a child theme in WordPress is essential for customizing your site without losing your changes during theme updates. A child theme allows you to modify or enhance your existing theme’s functionality while keeping the parent theme intact. This guide will walk you through the process of creating a child theme specifically for the Astra theme without using any plugins, ensuring you have full control over your website’s design and features.
Watch the full tutorial on YouTube! – https://www.youtube.com/watch?v=DPRQlcbqU0I
What is a Child Theme in WordPress?
Before we dive into the creation process, let’s clarify what a child theme is. A child theme is a WordPress template that inherits the functionality and styling of another theme, known as the parent theme. By using a child theme, you can safely customize your site without affecting the parent theme’s code. If the parent theme receives an update, your customizations in the child theme will remain intact.
Benefits of Using a Child Theme
Using a child theme offers several advantages:
- Safe Updates: Child themes allow you to update the parent theme without losing your customizations.
- Easy to Maintain: If anything goes wrong, reverting to the original theme is straightforward, allowing you to easily switch back to the parent theme whenever needed.
- Enhanced Customization: Child themes allow you to customize CSS, PHP, and other template files without altering the original theme files, giving you the freedom to experiment with styles and functions without risking any changes to the main theme.
What to Do Before Creating a Child Theme
Before diving into the creation of a child theme, ensure you have the following:
- A Working WordPress Installation: Make sure the Astra theme is activated on your site.
- Basic Knowledge of WordPress File Structure: Familiarize yourself with the WordPress file structure and have access to your site’s file manager or an FTP client.
- Backup Your Site: Always create a backup of your website before making significant changes to avoid potential data loss.
- Familiarity with CSS and PHP: A basic understanding of CSS and PHP will enhance your ability to customize your child’s theme effectively.
Now, let’s get started!
How to Create a Child Theme
Step 1: Create the Child Theme Folder
1. To get started with creating your child theme, follow these steps:
2. Navigate to the Themes Directory: Access your WordPress installation directory, typically found at wp-content/themes.
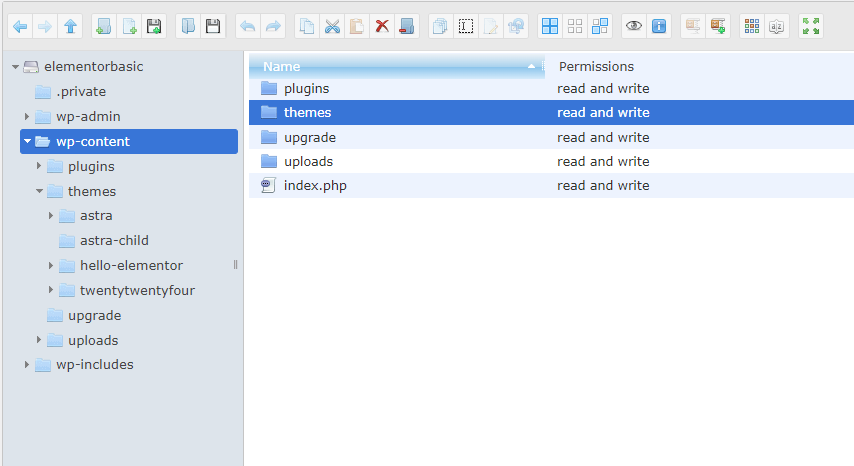
3. Create a New Folder: Inside the themes directory, create a new folder for your child’s theme. It’s a good practice to name it something like astra-child (if using the Astra theme) or twentytwentyfour-child (if using the Twenty Twenty-Four theme), replacing “twentytwentyfour” with the name of your parent theme.
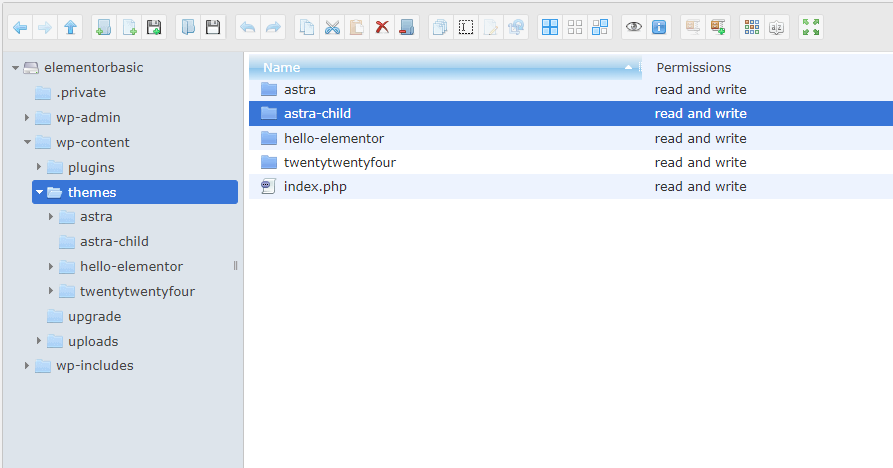
4. This new folder will serve as the directory for your child theme, where you will store all the necessary files for customization.
Step 2: Create the Child Theme’s style.css File
Inside your child theme folder, create a file named style.css. This file will contain the details of your child’s theme and its custom styles.
1. Create the style.css File: Open a text editor and create a file named style.css in your child theme folder.
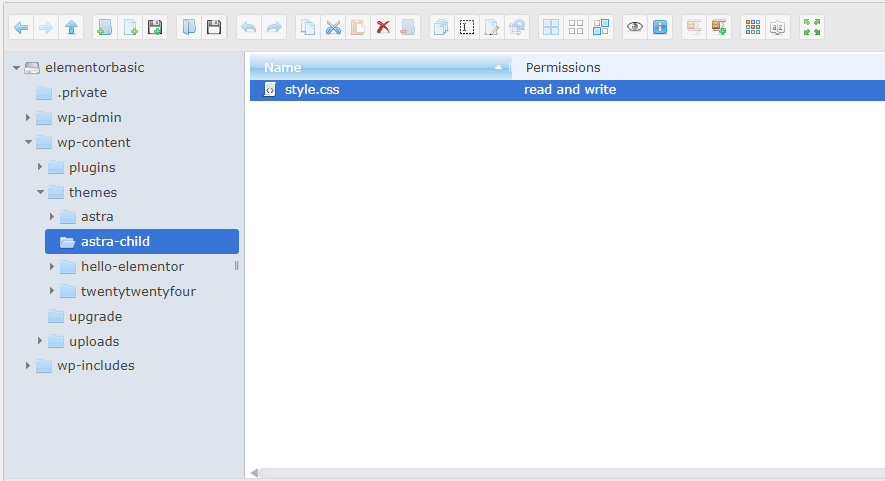
2. Add Theme Header and Custom Styles: Use the following template for your style.css file:
/*
 Theme Name:   Astra Child
 Theme URI:    https://example.com/astra-child
 Description:  Astra Child Theme for custom modifications
 Author:       Your Name
 Author URI:   https://example.com
 Template:     astra
 Version:      1.0.0
 Text Domain:  astra-child
*/

/* Custom styles go here */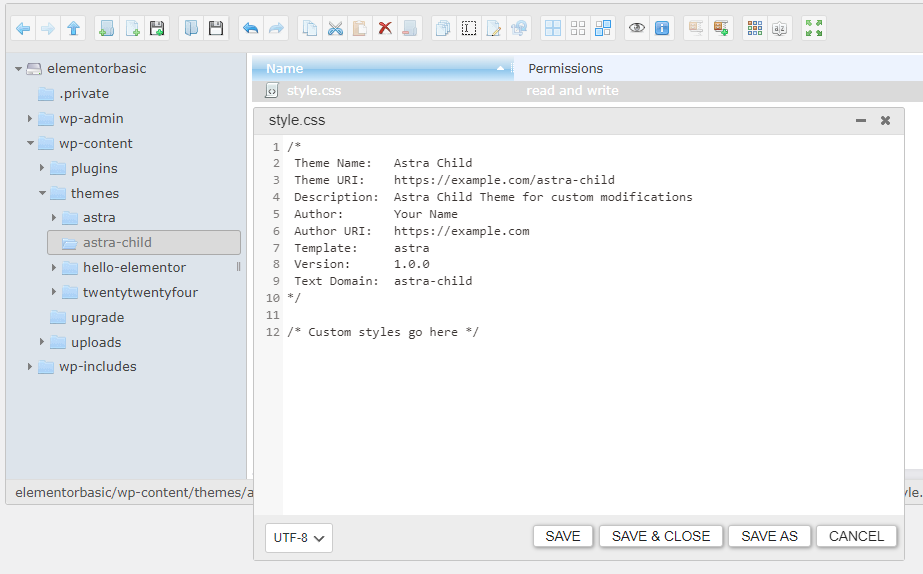
Required and Optional Points:
- Required:
- Theme Name: The name of your child theme (e.g., “Astra Child”).
- Author: Your name or the name of the theme creator.
- Template: The directory name of the parent theme (in this case,
astra).
- Optional:
- Theme URI: A URL for your child theme.
- Description: A brief description of your child’s theme.
- Author URI: A URL for the author.
- Version: The version number of your child theme.
- Text Domain: A unique identifier for translation purposes.
Feel free to leave the optional fields blank if you don’t have that information. You can also add your custom styles below the header section to style your child theme as desired.
Step 3: Create the Child Theme’s functions.php File
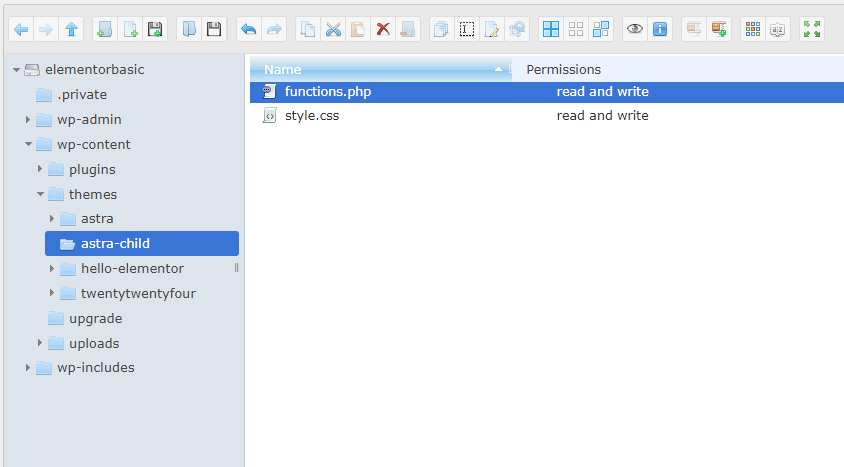
Next, you need to create a functions.php file in your child’s theme folder. This file will enqueue the parent theme’s stylesheet, ensuring that the styles from the parent theme are loaded before your child theme’s styles.
1. Create the functions.php File: Inside your child theme folder, create a file named functions.php
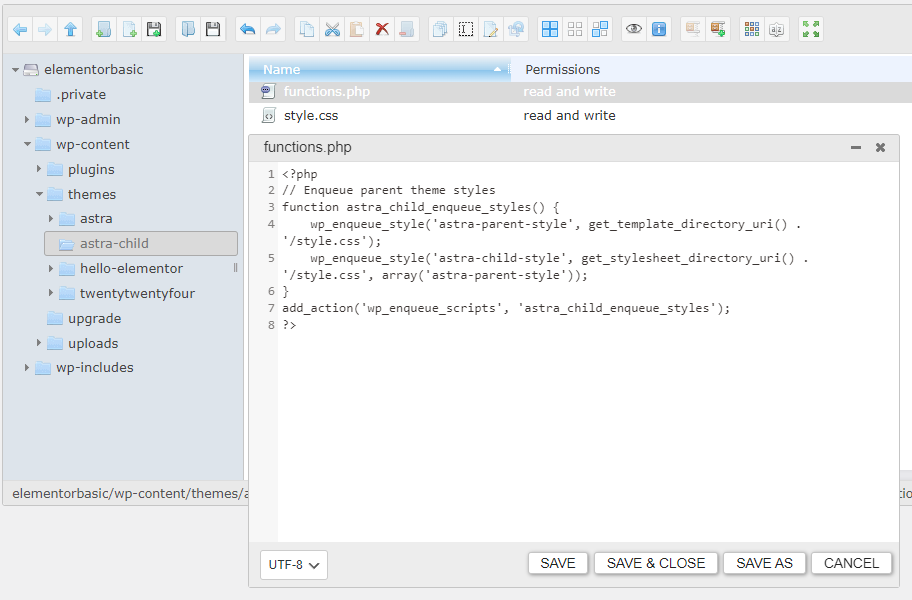
2. Add the Enqueue Code: Add the following code to your functions.php file
<?php
// Enqueue parent theme styles
function astra_child_enqueue_styles() {
    wp_enqueue_style('astra-parent-style', get_template_directory_uri() . '/style.css');
    wp_enqueue_style('astra-child-style', get_stylesheet_directory_uri() . '/style.css', array('astra-parent-style'));
}
add_action('wp_enqueue_scripts', 'astra_child_enqueue_styles');
?>
Explanation of the Code:
- Function Definition: The
astra_child_enqueue_stylesfunction is defined to handle the enqueuing of styles. - Enqueue Parent Style:
wp_enqueue_style('astra-parent-style', get_template_directory_uri() . '/style.css');loads the parent theme’s stylesheet. - Enqueue Child Style:
wp_enqueue_style('astra-child-style', get_stylesheet_directory_uri() . '/style.css', array('astra-parent-style'));loads the child theme’s stylesheet after the parent style. - Action Hook:
add_action('wp_enqueue_scripts', 'astra_child_enqueue_styles');hooks the function into WordPress, ensuring that the styles are loaded properly when the theme is rendered.
This setup tells WordPress to load the parent theme’s styles before loading your child theme’s styles, allowing you to customize the design effectively.
Step 4: Activate the Child Theme
Now that you’ve created the necessary files, it’s time to activate your child theme:
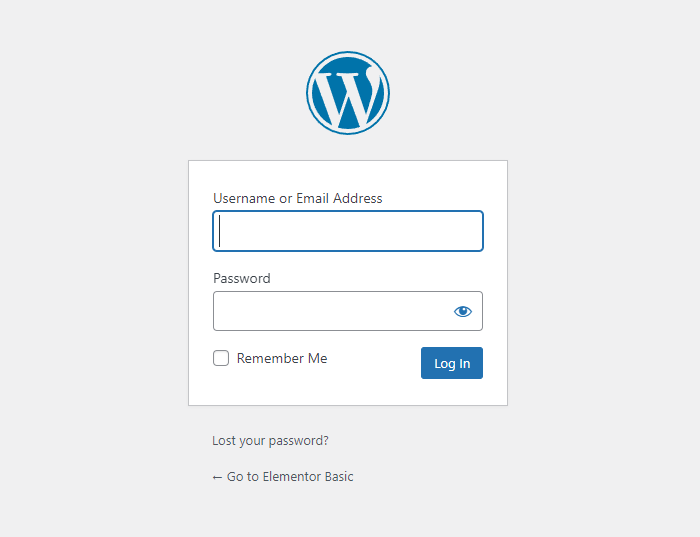
1. Log in to Your WordPress Admin Dashboard: Access your WordPress admin area.
Url For WordPress Admin Area Login – Your Site Name/wp-admin
2. Navigate to Themes: Go to Appearance > Themes.

3. Find Your Child Theme: Locate the Astra Child theme in the list of available themes.
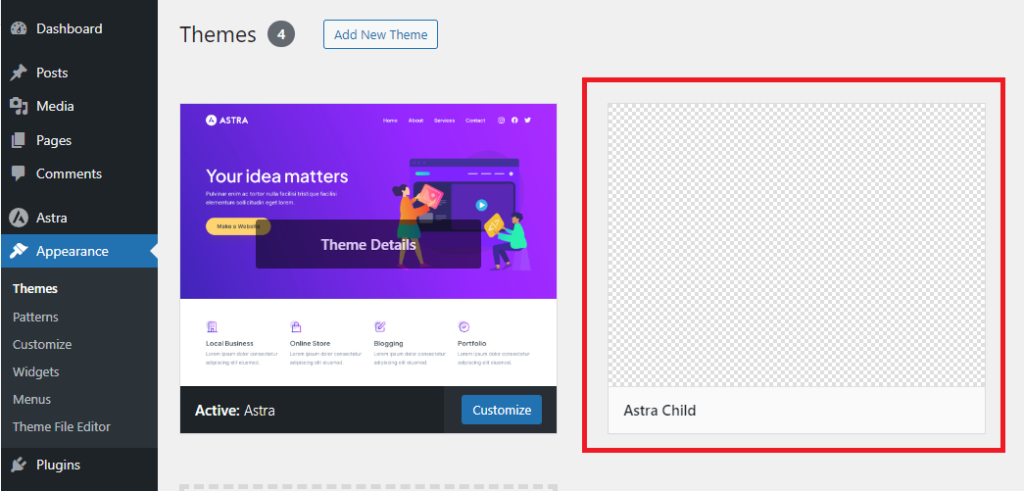
4. Activate the Child Theme: Click the Activate button next to your child theme.
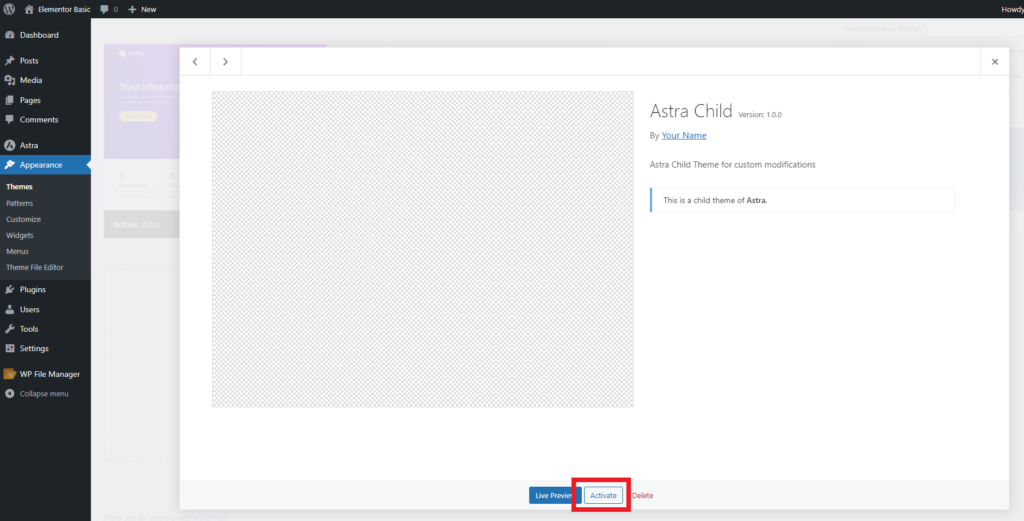
Once activated, your child theme will inherit all the features and styles of the Astra parent theme, allowing you to customize it further without affecting the parent theme.
Step 5: Set a Theme Image for Your Child Theme:
- Create or Download an Image:
- Create an image that represents your theme. This image could be a simple logo, design mockup, or a screenshot of your website.
- Recommended dimensions: 1200px wide by 900px tall (WordPress recommends these dimensions to ensure the image is displayed properly).
- File format: The image must be in PNG format and named
screenshot.png.
- Save the Image as
screenshot.png:- Make sure the image is named exactly as
screenshot.png(case-sensitive). - Save it to a location on your computer.
- Make sure the image is named exactly as
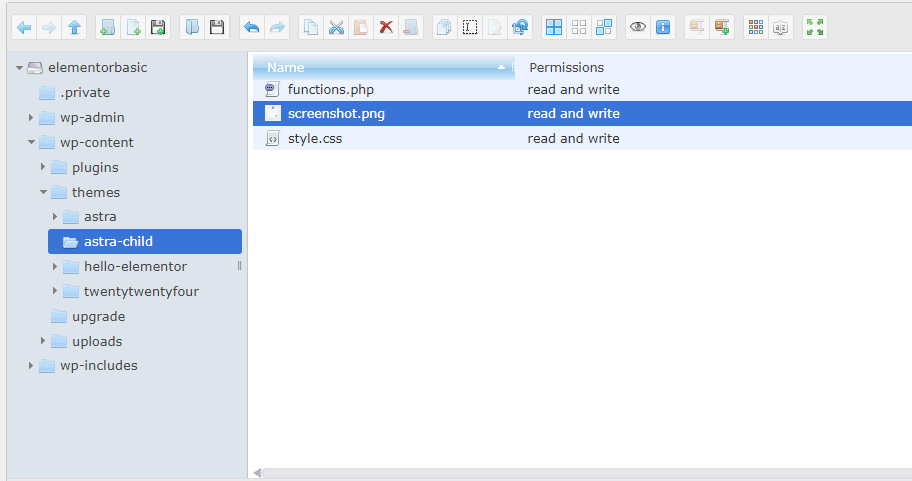
- Place the Image in the Child Theme Directory:
- Navigate to your WordPress installation folder on your local machine
Typically it is located in wp-content\themes\astra-child\ - Copy the
screenshot.pngfile and paste it into this folder.
- Navigate to your WordPress installation folder on your local machine
- Check-in WordPress Dashboard:
- Go to your WordPress admin area.
- Navigate to Appearance > Themes.
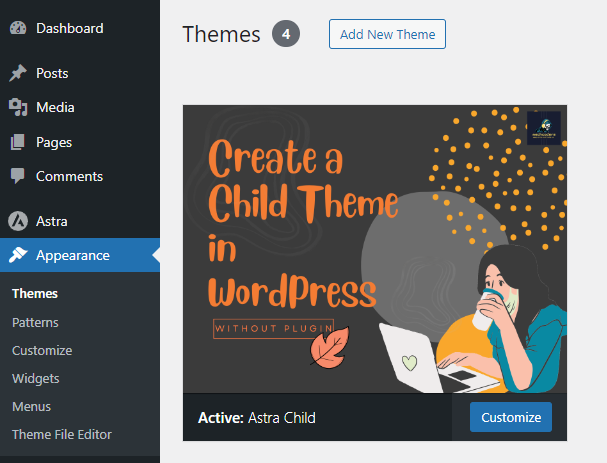
- You should now see your child’s theme with the new theme image you just uploaded.
Additional Tips:
- Aspect Ratio: Stick to the recommended aspect ratio of 4:3 (1200px x 900px). If the image is smaller or larger than this, it will still work, but WordPress may crop or resize it, which can affect how it looks.
- File Size: Keep the file size as small as possible while maintaining good quality (under 500KB is usually ideal) to ensure fast loading in the dashboard.
Example Image Path:
Once you’ve added the image, it will be accessible at:wp-content/themes/astra-child/screenshot.png
After completing these steps, the new image should appear next to your theme under Appearance > Themes.
Step 6: Customize Your Child Theme
Now that your child’s theme is active, you can start customizing it. Here are several methods you can use:
Method 1: Adding Custom CSS
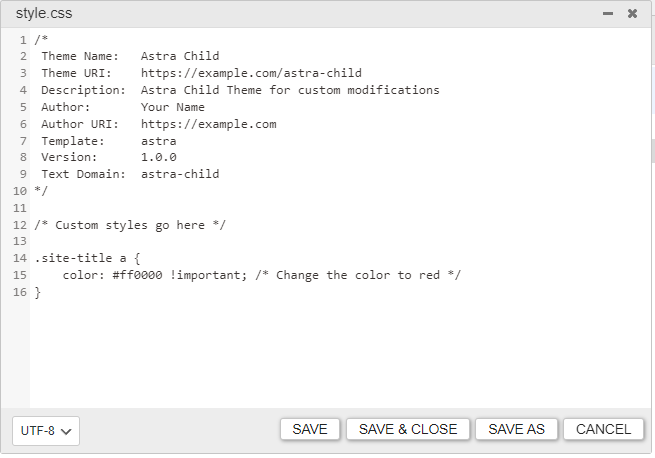
You can directly add your custom CSS rules to the style.css file in your child theme. This allows you to adjust the appearance of your website without altering the parent theme. For example, to change the site title color:
.site-title a {
    color: #ff0000 !important; /* Change the color to red */
}
Method 2: Copying Code from the Parent Theme’s class-astra-dynamic-css.php File
You can copy code directly from the Astra parent theme’s file to customize existing styles
Navigate to /wp-content/themes/astra/inc and open the class-astra-dynamic-css.php file. You might find relevant CSS rules to modify, such as:
:root {
    --ast-global-color-0: #046bd2;  /* Default primary color (Color May Different)*/
    --ast-global-color-1: #045cb4;
    --ast-global-color-2: #1e293b;
    --ast-global-color-3: #334155;
    --ast-global-color-4: #F0F5FA;
    --ast-global-color-5: #FFFFFF;
    --ast-global-color-6: #D1D5DB;
    --ast-global-color-7: #111111;
    --ast-global-color-8: #111111;
}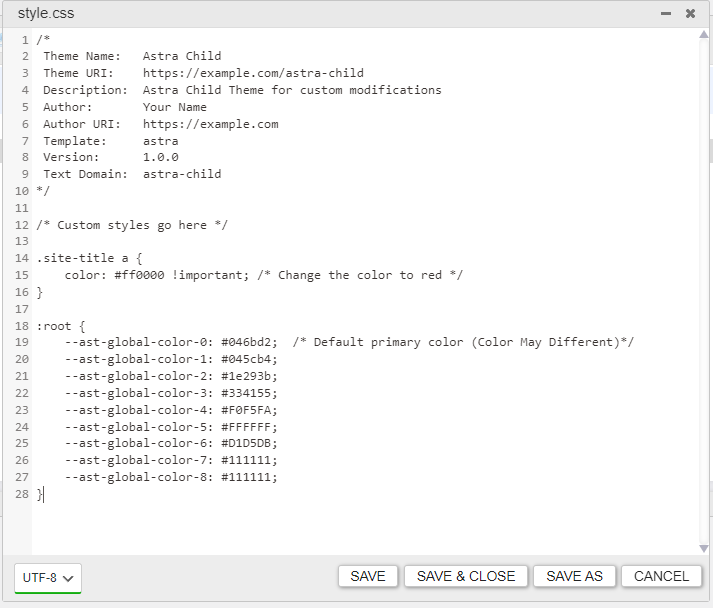
You can change these values in your child’s theme to fit your design.
Method 3: Adding New Functionality
You can add new features to your child’s theme in the functions.php file. For instance, to register a new widget area, add the following code:
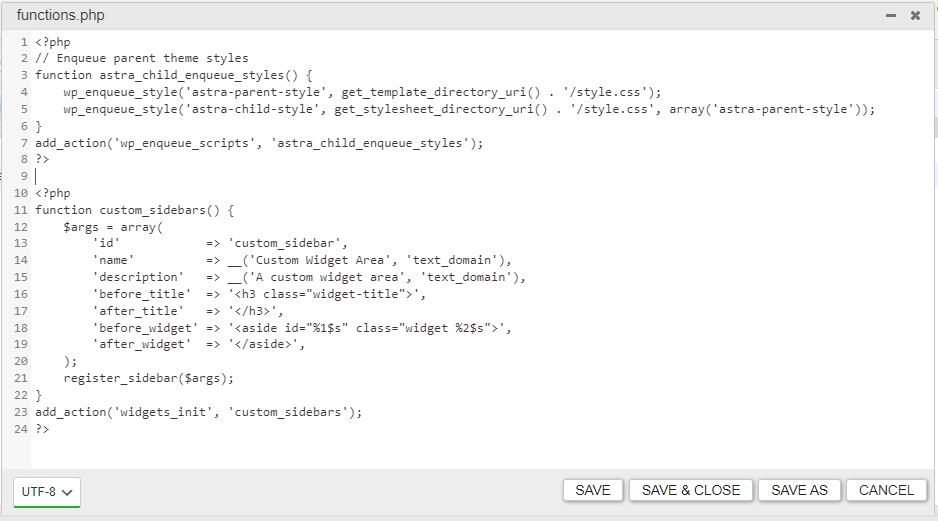
<?php
function custom_sidebars() {
    $args = array(
        'id'            => 'custom_sidebar',
        'name'          => __('Custom Widget Area', 'text_domain'),
        'description'   => __('A custom widget area', 'text_domain'),
        'before_title'  => '<h3 class="widget-title">',
        'after_title'   => '</h3>',
        'before_widget' => '<aside id="%1$s" class="widget %2$s">',
        'after_widget'  => '</aside>',
    );
    register_sidebar($args);
}
add_action('widgets_init', 'custom_sidebars');
?>
This code snippet creates a new widget area that you can use in your WordPress admin under Appearance > Widgets in the sidebar. The name of this widget area is ‘Custom Widget Area.
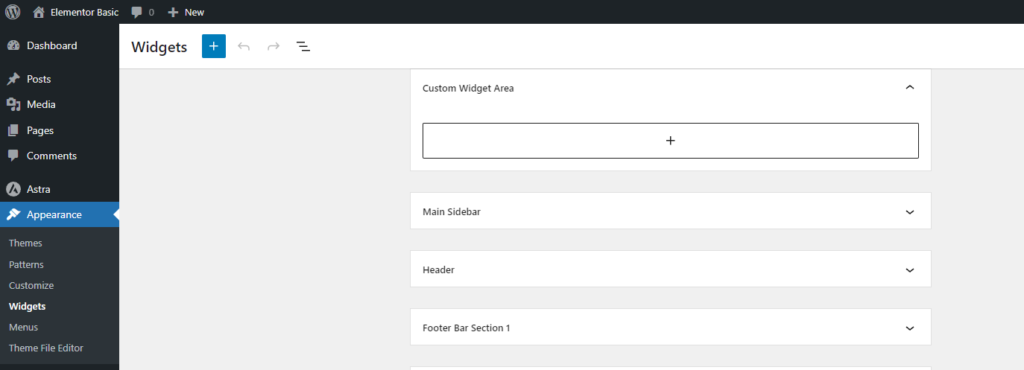
Method 4: Using Plugins
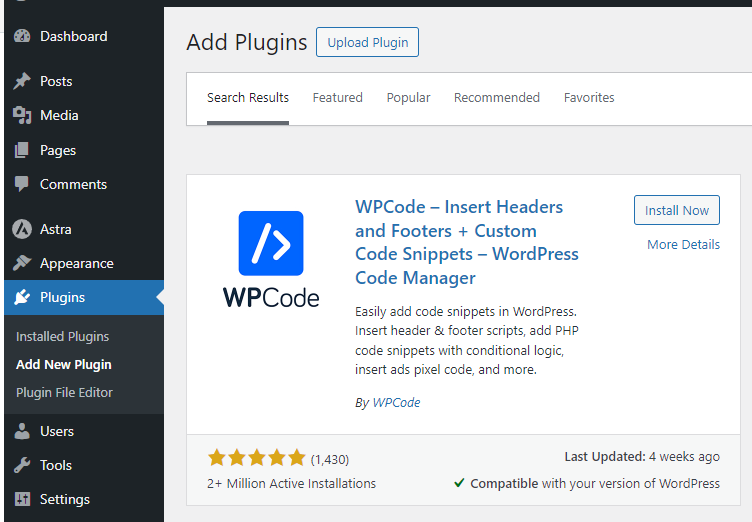
You can enhance your child’s theme with various plugins that help with styling and functionality. For example, using a page builder like Elementor can help you create custom layouts, or using WPCode allows you to add snippets without directly editing code.
Troubleshooting Your Child Theme
If you encounter issues while creating or activating your child’s theme, consider the following tips:
- Check for Syntax Errors: If your site breaks after adding code, there may be a syntax error. Use an online PHP validator to check your code.
- Clear Caches: If changes aren’t showing, try clearing your browser cache and any caching plugins you’re using.
- Enable Debugging: If you’re having trouble identifying the issue, enable WordPress debugging by adding
define('WP_DEBUG', true);it to yourwp-config.phpfile.
Conclusion
Congratulations! You’ve successfully created a child theme for the Astra theme in WordPress. With your child theme activated, you can now customize your site safely and effectively. Remember, the beauty of a child theme lies in its flexibility and the ability to experiment without fear of losing your customizations during updates.
We hope you find this article helpful. Feel free to explore our other posts on Mechcoders Blogs.
If you liked this article, then please subscribe to our YouTube Channel for WordPress video tutorials. You can also find us on Linkedin and Facebook.

