WordPress is the most popular content management system for building websites, but its usefulness goes beyond live projects. It’s a great tool for testing web development projects locally. In this guide, we’ll show you how to install WordPress on localhost, which is perfect for web development and testing, without needing a web hosting plan.
We’ll walk through the steps using XAMPP, a free, cross-platform web server compatible with major operating systems. Let’s first explore the concept of running WordPress locally and its benefits.
Watch the full tutorial on YouTube! – https://www.youtube.com/watch?v=xoqTy2D1AXY&t=319s
What is Localhost?
Localhost refers to “this computer”—the one you’re using right now. When installing WordPress locally, you create a private website that runs on your device instead of being publicly hosted online.
Normally, when you visit a website, your browser retrieves data from a server. In contrast, with a localhost installation, your computer acts as the server, holding all the necessary files to display the website. However, the website is not accessible to others and remains private on your device.
Why Use Localhost for WordPress?
Installing WordPress locally allows you to create and test a website without needing a hosting service. It offers a chance to experiment freely with settings, themes, and plugins before launching the site. Local installations enhance privacy and also speed up development as you’re not limited by your internet speed.
Since all the files are stored locally, you don’t need an FTP connection, or even an internet connection, to work on your site.
Can I Run Multiple Local WordPress Websites?
Yes! You can run several WordPress websites on localhost. Just create separate folders for each site (e.g., WPsite1, WPsite2) and assign a unique database to each one. This makes it possible to test multiple projects simultaneously.
Best Localhost Environment for WordPress: XAMPP
When setting up a local WordPress environment, XAMPP is the best choice. XAMPP stands for Cross-Platform, Apache, MySQL, PHP, and Perl, and it works seamlessly on Windows, MacOS, and Linux. It’s specially optimized for Windows users.
XAMPP bundles all the essential components needed for a local server into one easy-to-install package, making it perfect for developers at any level. To get started, simply download XAMPP for free from the official Apache Friends website. It’s versatile, reliable, and simplifies local WordPress development.
How to Install WordPress on Localhost in 6 Simple Steps
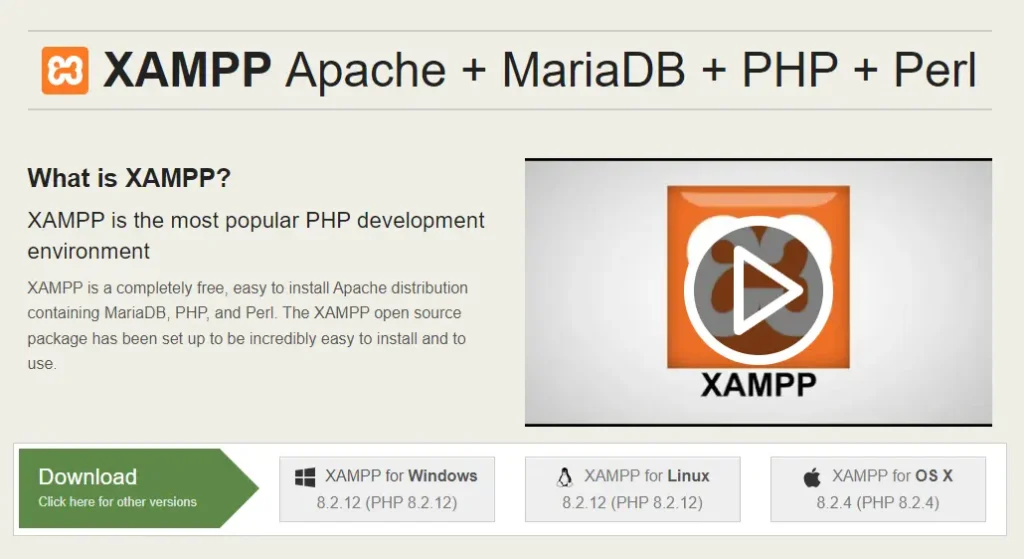
1. Download XAMPP
First, download XAMPP from the official Apache Friends website. Make sure to select the appropriate version for your operating system (Windows, Mac, or Linux).
2. Install and Run XAMPP
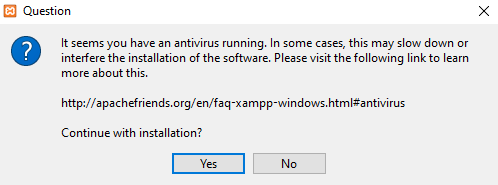
Run the XAMPP installer and follow the installation instructions using the default settings. If you see a pop-up indicating that your antivirus software might affect the installation process, click Yes to continue.
After installing XAMPP, run the application and configure the environment. In the XAMPP control panel, start Apache and MySQL modules to perform the WordPress localhost installation.
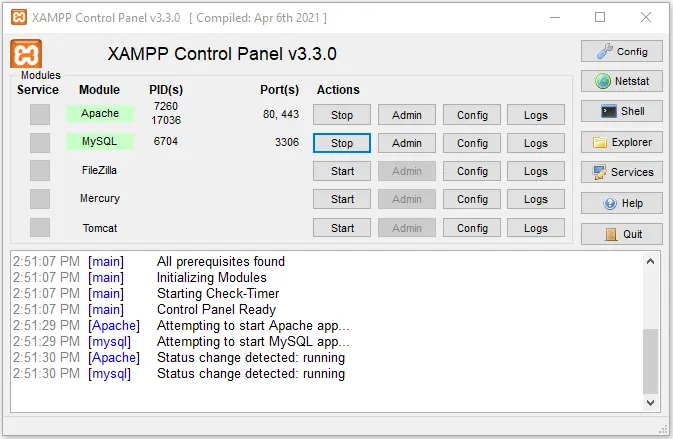
If you’re running on the Windows operating system, there’s a chance you might encounter the localhost refused to connect error. Disabling your firewall temporarily or stopping the program that uses port 80 should resolve this issue.
3. Download WordPress
After XAMPP is running, go to the official WordPress website and download the latest version of WordPress. Extract the downloaded ZIP file, and copy the files to the htdocs folder within your XAMPP directory (usually C:\xampp). You can rename the folder according to your project (e.g., “mywebsite”).
Note: - Keep All the File in a direct Folder or main folder (e.g., "mywebsite").
4. Create a Local Database
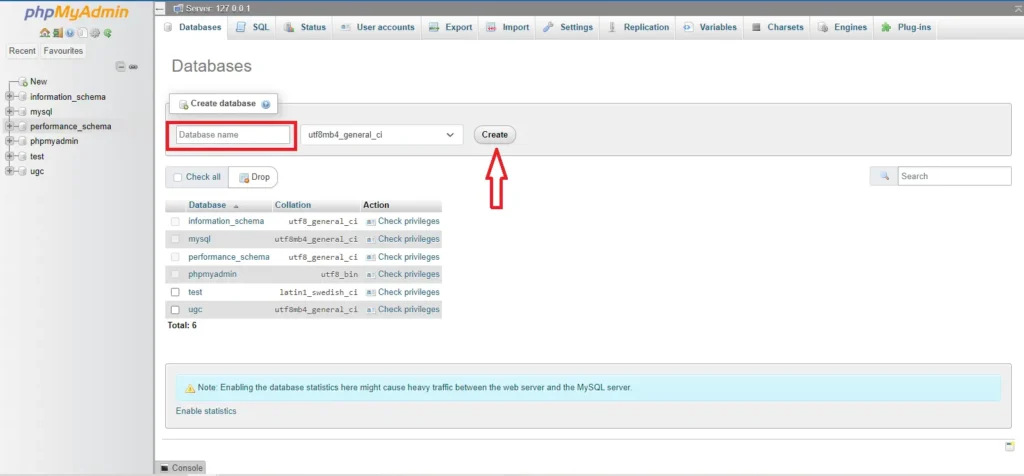
Next, open the XAMPP control panel and click on Admin for MySQL or Follow the Url Structure (e.g., http://localhost/phpmyadmin), which will open phpMyAdmin. Go to the Databases tab, enter a name for your new database

, and click Create. This will be the database for your WordPress website.
5. Install WordPress Locally
Now, in your browser, go to http://localhost/foldername, replacing “foldername” with the name of the folder you created in the htdocs folder. Follow the installation prompts and enter the following information:
- Database Name: The name you created in phpMyAdmin. (e.g., “mywebsite”)
- Username: Use “root.”
- Password: Leave this blank.
- Database Host: Keep “localhost.”
- Table Prefix: Keep the default “wp_.”
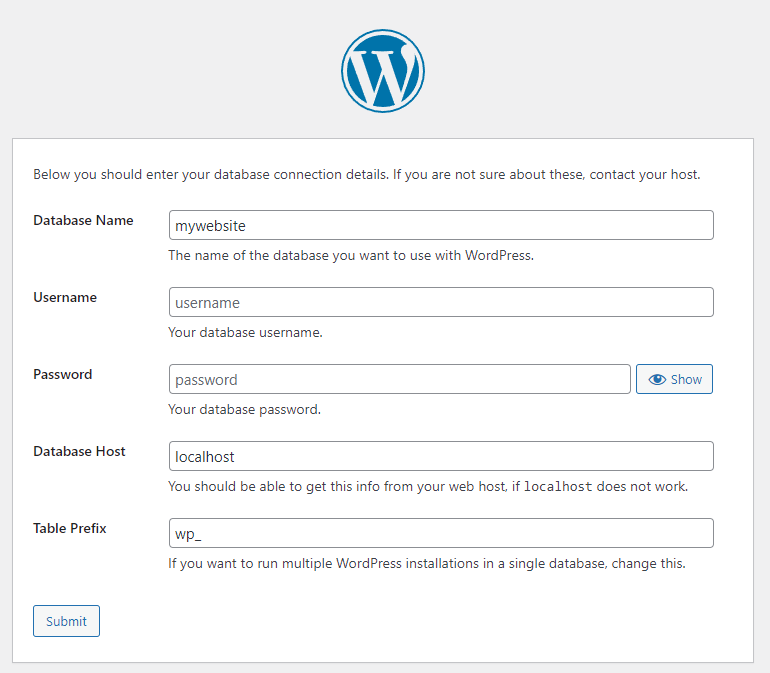
Once you’ve entered the required information, click Submit and then Run the installation. Fill in the additional information needed, like the site name and login credentials, and click on the Install WordPress button.
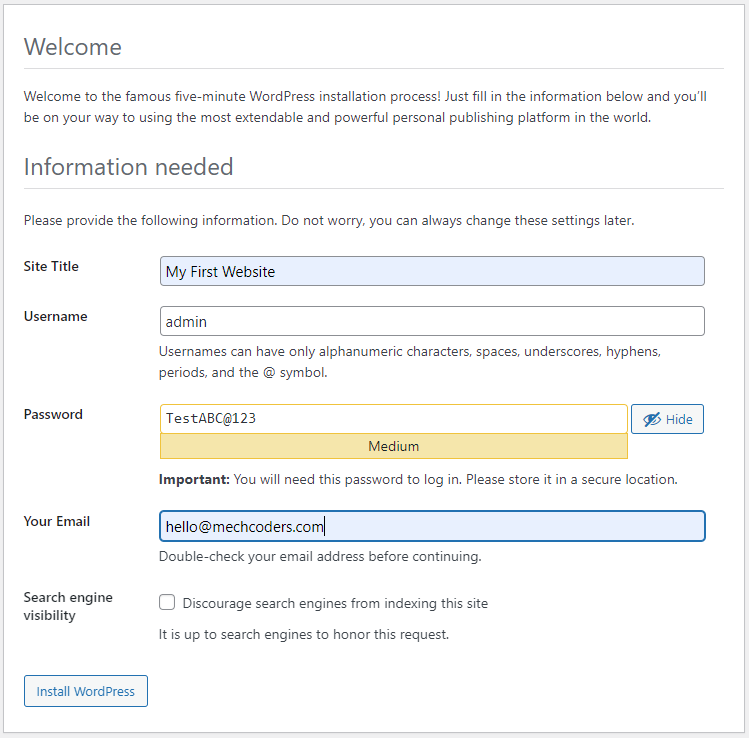
Pro Tip: For Windows and Linux, WordPress automatically stores the configuration in the wp-config.php file. On MacOS, you’ll need to manually update the file with the provided code snippet.
6. Access Your Local WordPress Site
Finally, go to http://localhost/foldername/wp-admin in your browser. Log in with the credentials you created during installation, and you’ll be taken to the WordPress dashboard. From here, you can start building and testing your site.
Conclusion
WordPress traditionally requires hosting and a domain to launch a site. However, installing it locally is a convenient way to test or develop a website without going live. This local installation is ideal for learning, experimenting, and building a website before pushing it live on a hosting server.
Quick Recap:
- Download XAMPP.
- Install and run XAMPP.
- Download WordPress.
- Create a local database in phpMyAdmin.
- Install WordPress on localhost.
- Access your local WordPress site.
We hope you find this article helpful. Feel free to explore our other posts on Mechcoders Blogs.
If you liked this article, then please subscribe to our YouTube Channel for WordPress video tutorials. You can also find us on Linkedin and Facebook.
